Products
Solutions
Resources
9977 N 90th Street, Suite 250 Scottsdale, AZ 85258 | 1-800-637-7496
© 2024 InEight, Inc. All Rights Reserved | Privacy Statement | Terms of Service | Cookie Policy | Do not sell/share my information

Snapshots take all information from your current project file and saves it to the Snapshot Management menu. After a snapshot is saved, you can set another snapshot, overwrite a snapshot, delete a snapshot, save as a new schedule, or promote to a schedule.
There are only two snapshot slots available per project. The information on the snapshot cannot be edited after it has been created. Only the name of the snapshot can be changed.
The active baseline and any available snapshots are in a grid format, in addition to a color-coded metric table. This lets you see a comparison between the current schedule, active baseline, and available snapshots.

You can also assign other schedules that are part of the same project workspace as the current schedule to your active baseline and snapshots using the assign schedule function.
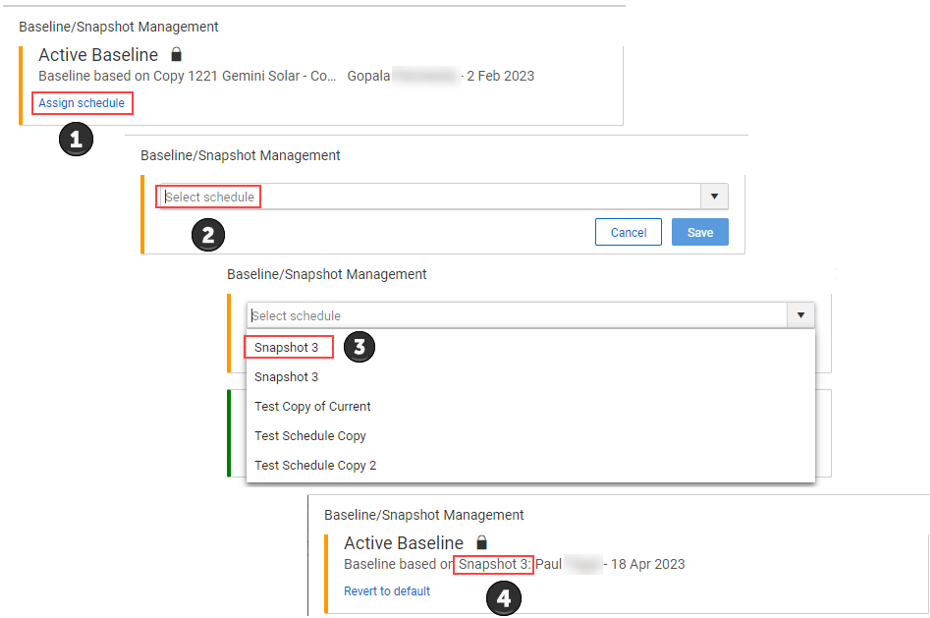
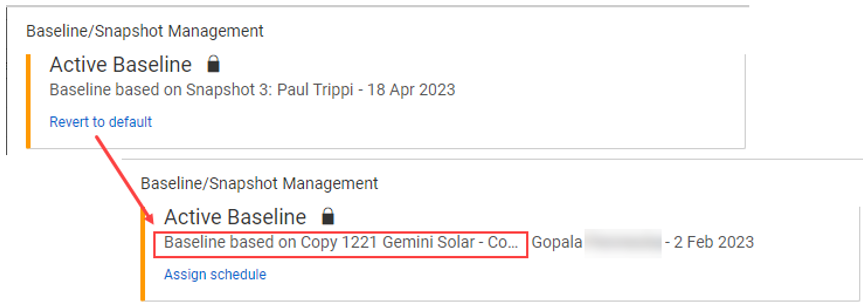
Select Revert to default to return to the previously assigned defaulted schedule.
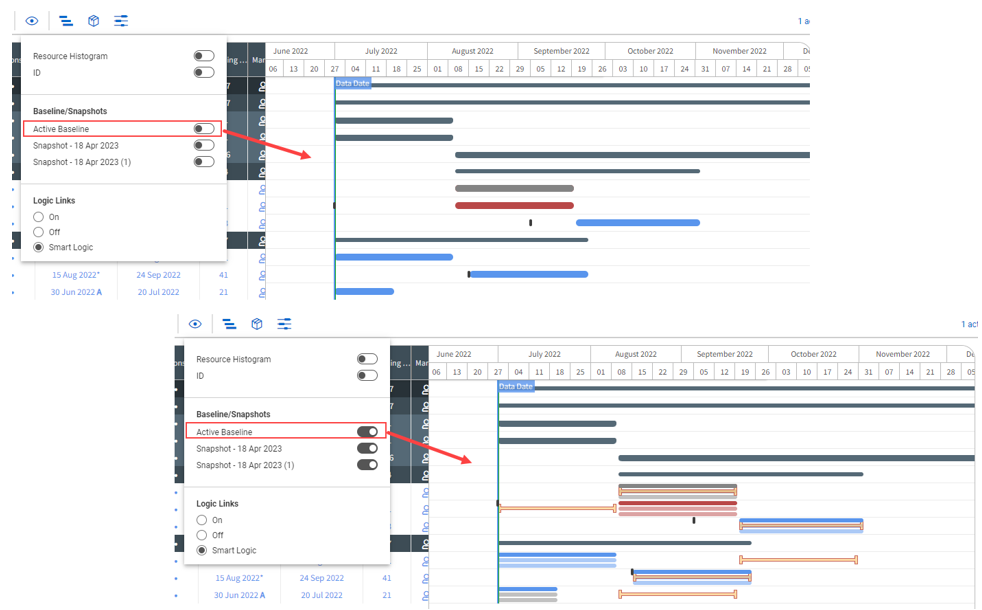
The images below show what the Gantt chart illustrates when the active baseline is turned off and then on.
The following step-by-step walks you through how to create a snapshot.
You can only create snapshots from the Plan view.
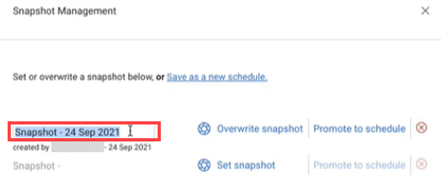
From the Plan view, select the Snapshot button in the toolbar. The Snapshot Management menu opens.
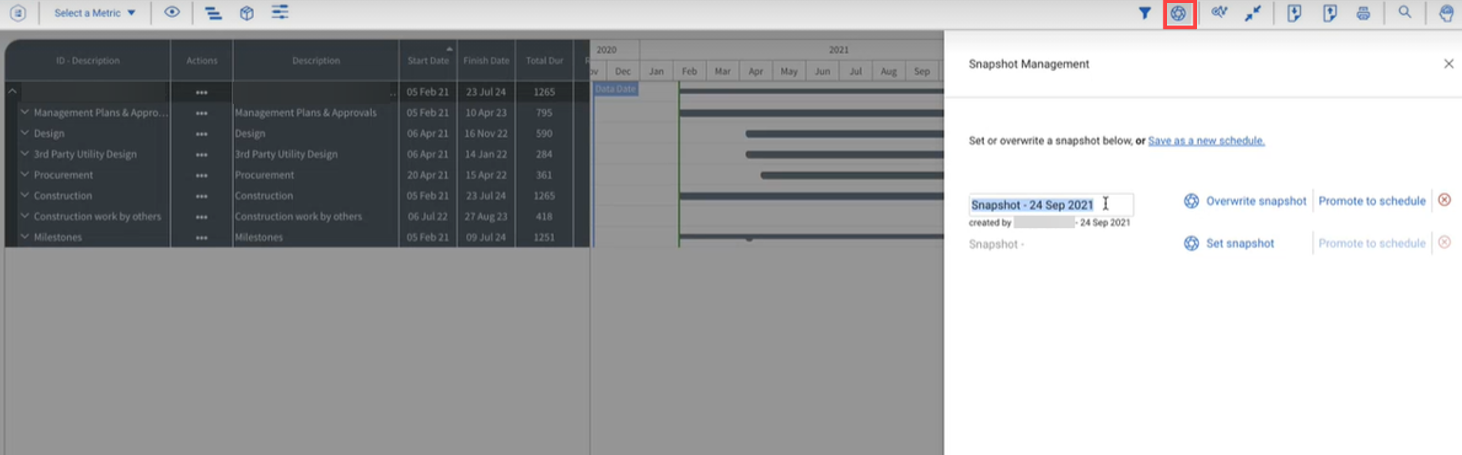
In the Snapshot Management menu, select Set snapshot. The snapshot automatically saves as Snapshot – [date].
Click the Edit icon next to the snapshot name to change the dialog box into an editable text box.
You can now rename the snapshot to a name of your preference.
You can overwrite a previous snapshot if the information saved in the first snapshot does not have the most up-to-date information.
If another user saved the snapshot you want to overwrite, confirm with that user that the information in the snapshot to be overwritten is no longer needed.
The following step-by-step walks you through how to overwrite an existing snapshot.
From the snapshot Management menu, find the snapshot you want to overwrite.
Select Overwrite snapshot.
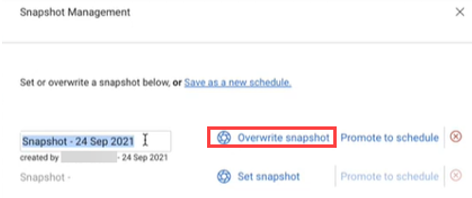
The old snapshot is overwritten and a new snapshot is saved in that snapshot slot.
Additional Information
9977 N 90th Street, Suite 250 Scottsdale, AZ 85258 | 1-800-637-7496
© 2024 InEight, Inc. All Rights Reserved | Privacy Statement | Terms of Service | Cookie Policy | Do not sell/share my information